|
Water Torture - Level 19 The next level takes place
in an underwater submarine docking station. You will need to find four keys as you make
your way through this level.
You begin this level exactly where you left
off in the previous level. You find yourself approaching a small beach on the small island
that the docking station is built under. Jump up onto the rock ledge and then drop into
the water, but don't swim under yet. Turn back facing where you just walked into the
water, facing northeast, and then swim downward. As you begin to swim down, you'll see an
opening about midway down from the surface to the bottom of this area. Quickly swim into
it and follow the underwater shaft into an open area where you can see observation
windows. Swim up to the surface and get a breath of air and turn facing south. Swim back
down and swim into the next underwater room ahead. Turn and face west and swim up to the
surface.
You should run into some Ninjas on the surface
which you'll need to eliminate. With this area clear, you'll see a door ahead of you that
requires the yellow key card and an elevator to the north which requires the red key card.
Make a note of this location as you'll need to return here later. Now open the door to the
south which leads down a short corridor with observation windows on each side. As always,
watch for enemies. Now open the door at the end of the corridor and walk into the next
corridor. This corridor opens up into the submarine dock itself. When you approach the end
of the corridor, turn to your left and take a running jump to the landing.
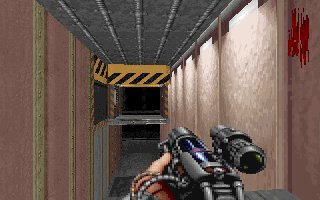
On your right, you'll see some barrels in
front of a workbench. On your left you'll see another corridor. About mid way down this
corridor, you can go can see a door to the right. Don't go this way yet. Go down the
corridor and walk straight down it to where you can see the first aid sign on the wall
ahead of you. Inside of this sign is a portable medkit. To the right, is a hatch that
holds a Grenade Launcher. Now go back to where the barrels and workbench were and turn the
west. You'll see a ladder that leads down inside of the docked submarine. Drop down inside
and pick off the enemies inside.
Picture: The blue key card is in the piston the female mechanic is
working on.
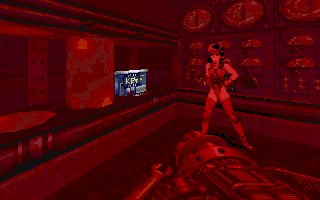 There is a switch just inside the sub to the
left that activates the sub's periscope. If you activate it, there is a flash bomb
exposed. On the other side, you'll see an Uzi. Now walk further into the sub until you
reach a door on the left side of the west wall. Open the door and a female mechanic is
there. You'll see three pistons in front of the mechanic, but only the middle and left
ones are moving. Walk over to the one on the right and press the space bar and it will
lower and expose the blue key card. Grab it and the Railgun rods behind the mechanic and
exit the submarine. There is a switch just inside the sub to the
left that activates the sub's periscope. If you activate it, there is a flash bomb
exposed. On the other side, you'll see an Uzi. Now walk further into the sub until you
reach a door on the left side of the west wall. Open the door and a female mechanic is
there. You'll see three pistons in front of the mechanic, but only the middle and left
ones are moving. Walk over to the one on the right and press the space bar and it will
lower and expose the blue key card. Grab it and the Railgun rods behind the mechanic and
exit the submarine.
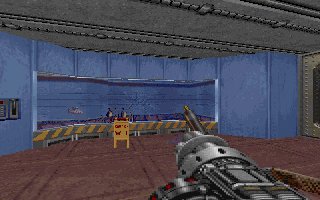
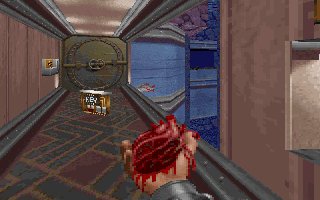
Picture: The crack in this window can be broken.
 As you exit the submarine up the ladder, the
blue key card door is straight ahead of you on the north wall. Use the card and open the
door and walk through this corridor in front of you. As you open the next door at the end
of this corridor you'll notice an explosive tank in front of a closed viewing window, a
barracks room to your right and a red key card door ahead of you. There is a switch on the
wall near the viewing window that opens the shields. As the window is exposed, you'll
notice a crack in the window. As you exit the submarine up the ladder, the
blue key card door is straight ahead of you on the north wall. Use the card and open the
door and walk through this corridor in front of you. As you open the next door at the end
of this corridor you'll notice an explosive tank in front of a closed viewing window, a
barracks room to your right and a red key card door ahead of you. There is a switch on the
wall near the viewing window that opens the shields. As the window is exposed, you'll
notice a crack in the window.
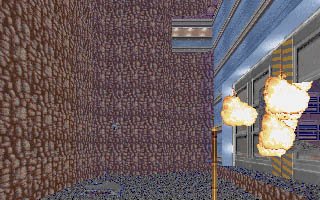
Go into the barracks room on the east. Inside
you'll see a vacuum cleaner which can be used. There are also two air duct grills in this
room, one straight ahead up high, and another to the right as you first enter this room.
Shoot both grills out and then move the vacuum cleaner in front of the grill that was just
inside the room. Jump on top of the handle and then into the duct and grab the Sticky
Bombs hidden inside. Now blast the crack in the window by shooting the explosive tank and
the room will flood. Swim up into the other duct and the red key card can be found. Now
swim out of the window you just blasted open and up to the surface.
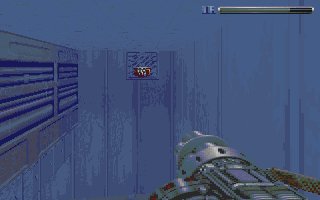
Picture: You can swim into the grill when the room is flooded and
grab the red key card.
 Now that you are on the surface, swim back
down where you originally went to get into this compound. Now walk to the red key card
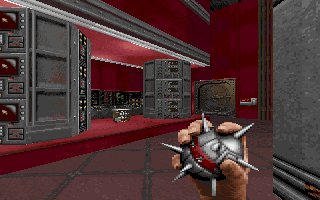
slot by the elevator. As you drop down the open elevator, you'll enter a control room that
is guarded by some Rippers. Take them out quickly and then enter the room. As you enter
the room, you'll see the green key card ahead of you. You'll also see a closet door to
your left that has some armor inside of it. As you walk round this room, pick up the ammo
and items that you need. There is also another closet that has caltrops inside. The red
key card door you see cannot be opened as it is the door that opens into the area you
flooded in order to get that key. Now that you are on the surface, swim back
down where you originally went to get into this compound. Now walk to the red key card
slot by the elevator. As you drop down the open elevator, you'll enter a control room that
is guarded by some Rippers. Take them out quickly and then enter the room. As you enter
the room, you'll see the green key card ahead of you. You'll also see a closet door to
your left that has some armor inside of it. As you walk round this room, pick up the ammo
and items that you need. There is also another closet that has caltrops inside. The red
key card door you see cannot be opened as it is the door that opens into the area you
flooded in order to get that key.
Picture: The green key card is in plain site.
 Go back up the elevator and walk thru the east
door back out to the end of the corridor where you leaped to get inside of the submarine.
Leap over to this area again and walk down the corridor, but this time open the door to
the right about mid way down this corridor. When you reach the end of this corridor,
you'll run into another door. On the other side of this door are enemies, so prepare for a
fight. When you have eliminated them, continue walking down the corridor. About mid way
down you'll see a hoist from a platform to your left. There is another Guardian down the
hall here on the upper level. Turn and fight him here from a distance until he is history.
Now continue down the corridor. You'll see the yellow key card door ahead of you. Make
note of this door as you'll need to come back to it soon. As you continue walking, there
are Uzi clips on your right and a hatch at the end of the ramp which holds a Riot Gun.
Turn left to the east and take a few steps to the end of this corridor and then turn to
your right facing south. Again, walk ahead a few steps and then turn 180 degrees around.
You can see a ladder leading up to your left. Climb up the ladder to the top and walk to
the left to the green key card door. Use your card on the slot and enter the room inside. Go back up the elevator and walk thru the east
door back out to the end of the corridor where you leaped to get inside of the submarine.
Leap over to this area again and walk down the corridor, but this time open the door to
the right about mid way down this corridor. When you reach the end of this corridor,
you'll run into another door. On the other side of this door are enemies, so prepare for a
fight. When you have eliminated them, continue walking down the corridor. About mid way
down you'll see a hoist from a platform to your left. There is another Guardian down the
hall here on the upper level. Turn and fight him here from a distance until he is history.
Now continue down the corridor. You'll see the yellow key card door ahead of you. Make
note of this door as you'll need to come back to it soon. As you continue walking, there
are Uzi clips on your right and a hatch at the end of the ramp which holds a Riot Gun.
Turn left to the east and take a few steps to the end of this corridor and then turn to
your right facing south. Again, walk ahead a few steps and then turn 180 degrees around.
You can see a ladder leading up to your left. Climb up the ladder to the top and walk to
the left to the green key card door. Use your card on the slot and enter the room inside.
Picture: Jump onto the moving platform to reach the other side.
 This room has the controls for the platform
that had the hoist hanging down from it you saw earlier. Walk straight in, grab the
shotgun shells and the fortune cookie and then turn facing east and activate the switch.
You'll see the platform start moving. Now walk back out the green key card door and over
by the ladder where you can walk into the platform as it approaches. Once you've
successfully gotten on the platform and off onto the other side, you'll see another door
down to the left and a first aid sign on the wall. Again, there is a portable medkit
behind this sign. Prepare for enemy attacks as you open this door and enter. When you have
eliminated them, walk forward into this corridor and you'll see the yellow key card ahead
of you as well as a Missile Launcher to the right. This room has the controls for the platform
that had the hoist hanging down from it you saw earlier. Walk straight in, grab the
shotgun shells and the fortune cookie and then turn facing east and activate the switch.
You'll see the platform start moving. Now walk back out the green key card door and over
by the ladder where you can walk into the platform as it approaches. Once you've
successfully gotten on the platform and off onto the other side, you'll see another door
down to the left and a first aid sign on the wall. Again, there is a portable medkit
behind this sign. Prepare for enemy attacks as you open this door and enter. When you have
eliminated them, walk forward into this corridor and you'll see the yellow key card ahead
of you as well as a Missile Launcher to the right.
Picture: Grab the yellow key card, but don't go thru this door.
 A yellow key card door is right in front of
the key card, but this door takes you back to the area where you first entered the
compound and it is way out of the way of where you need to go next. Instead, travel back
to where the moving platform is and go to the other yellow key card door we saw in the
corridor on the next level down. Go to this door and walk inside to the end where you see
a switch on the wall that activates the elevator ahead of it. Enter the elevator and hit
the switch inside of it to lower it again. Turn to the north and watch for enemies. When
they are no longer a threat, walk inside to the room at the end of the corridor. A yellow key card door is right in front of
the key card, but this door takes you back to the area where you first entered the
compound and it is way out of the way of where you need to go next. Instead, travel back
to where the moving platform is and go to the other yellow key card door we saw in the
corridor on the next level down. Go to this door and walk inside to the end where you see
a switch on the wall that activates the elevator ahead of it. Enter the elevator and hit
the switch inside of it to lower it again. Turn to the north and watch for enemies. When
they are no longer a threat, walk inside to the room at the end of the corridor.
Picture: The remote controlled vehicle has a powerful gun.
 Straight ahead of you there is a hatch that
holds a medkit and a nuclear warhead. To the right you'll see a remote control in front of
the underwater viewing window. This remote control operates the vehicle in the water in
this area. This vehicle comes complete with a gun. Use the remote to maneuver the vehicle
to where you can shoot the crack in the door in the south side of this underwater cave.
Once you have blasted it apart, go out of this room and up the elevator and head back down
the corridor that leads you back to where the docked submarine is located. Go to where you
picked up the medkit and Riot Gun over by the rear of the submarine. Drop down into the
water and face west. Swim down quickly and then turn to your right and you can see a
blasted opening ahead of you to the north. Swim into it and then surface for air. You now
are on the other side of the island. Swim to the rock and grab the Missile Launcher, then
head south and jump onto the rock ledge there. Jump up once more and see the exit to the
northeast. Hit the exit and prepare for the final level, Stone Rain. Straight ahead of you there is a hatch that
holds a medkit and a nuclear warhead. To the right you'll see a remote control in front of
the underwater viewing window. This remote control operates the vehicle in the water in
this area. This vehicle comes complete with a gun. Use the remote to maneuver the vehicle
to where you can shoot the crack in the door in the south side of this underwater cave.
Once you have blasted it apart, go out of this room and up the elevator and head back down
the corridor that leads you back to where the docked submarine is located. Go to where you
picked up the medkit and Riot Gun over by the rear of the submarine. Drop down into the
water and face west. Swim down quickly and then turn to your right and you can see a
blasted opening ahead of you to the north. Swim into it and then surface for air. You now
are on the other side of the island. Swim to the rock and grab the Missile Launcher, then
head south and jump onto the rock ledge there. Jump up once more and see the exit to the
northeast. Hit the exit and prepare for the final level, Stone Rain.
On
to Level 20
|


